Auto Layout 与 CAKeyframeAnimation
前言
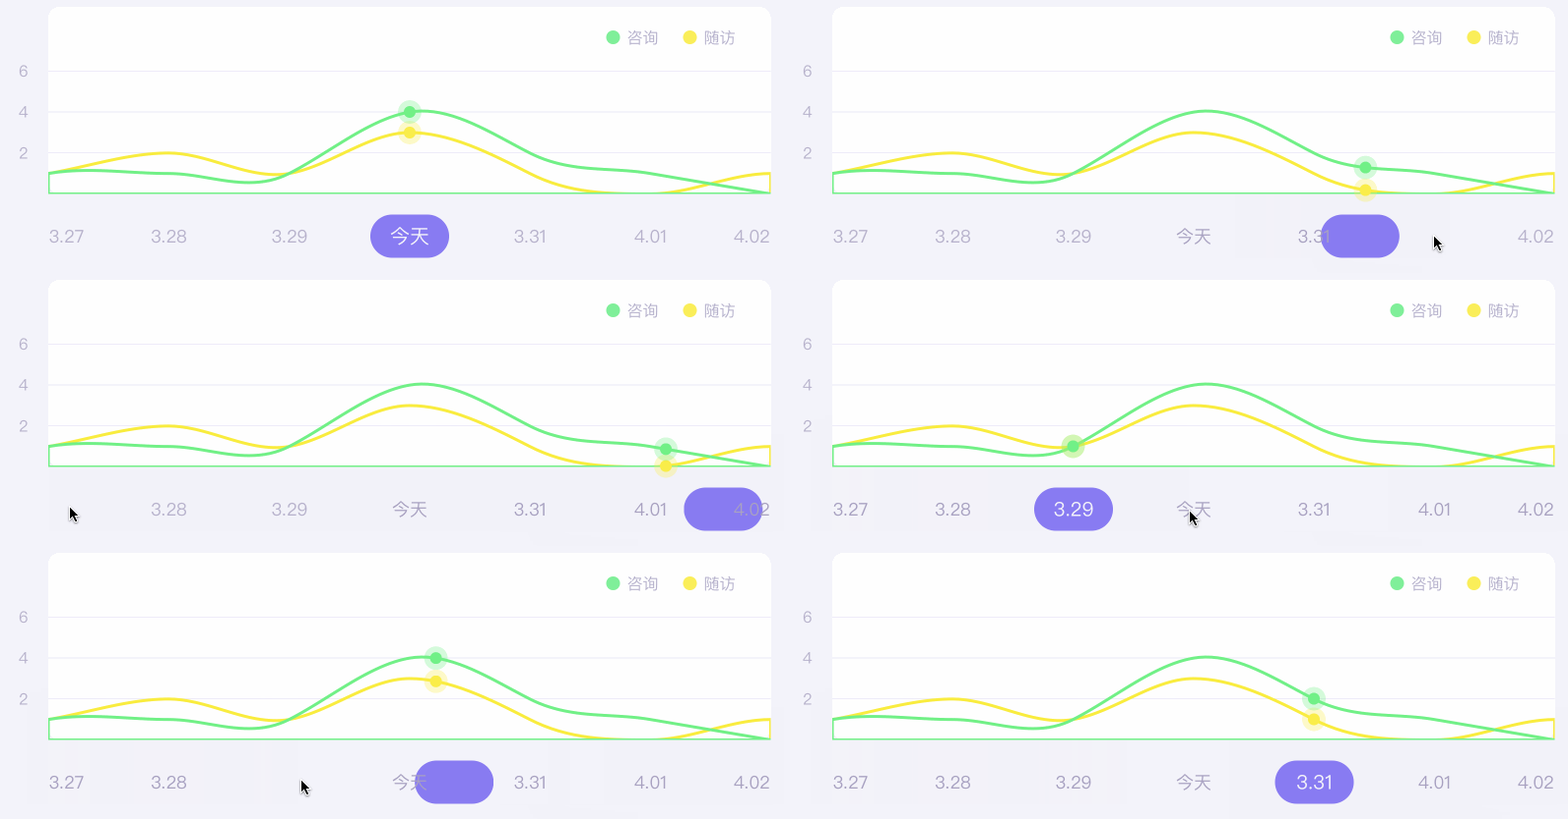
最近实现了一个基于Auto Layout的CAKeyframeAnimation。先来看一下效果👇

问题分析
看了效果图,第一反应应该是使用 CAKeyframeAnimation,让两个圆型view的position随着图中的贝塞尔曲线(CGPath)运动。
那么问题来了:整个视图是使用 Auto Layout 来实现的,并没有指定每个视图的frame,我们是否可以使用CAKeyframeAnimation呢?这就引出了下面要讲的几点👇
- Auto Layout的本质
- 普通的基于Auto Layout 的动画
- 在Auto Layout视图中获取frame
- CATransaction 与 CAKeyframeAnimation
- Auto Layout 百分比布局
Auto Layout 的本质
关于iOS Drawing 这篇文章里面讲述了 iOS系统将View显示在屏幕上的6个详细步骤。这里说一下前面3个步骤:
- Layout:将一个或者多个UIView(也就是UIView hierarchy)显示在屏幕上的第一步就是 计算每个layer的frame。无论代码使用Auto Layout 还是 Auto Resizing 还是直接指定了View的frame,iOS都会计算出每个layer的frame。
- Display:此时已经知道每个Layer的frame,这一步会执行
-drawRect:方法,执行custom的绘制,生成layer的backing image。 - Prepare:这一步开始准备每个Animation的属性,比如要动画的layer属性,以及终止值等等。
划重点啦:
- Auto Layout虽然没有指定frame,但是iOS会根据这些约束,在内部算出layer的frame。所以Auto Layout的本质也就是指定每个View的frame
- 在计算出每个layer的frame属性时,才开始准备Animation的参数。所以不存在基于Auto Layout的动画;指定动画属性时,还是指定与view的frame相关的属性
普通的基于 Auto Layout 的动画
How do I animate constraint changes? 这个stackoverflow的问题探讨了如何通过改变约束来使视图动画
1 | - (void)moveBannerOffScreen { |
注释0:先强行计算出每个view的动画开始前的frame
注释1:先更改约束条件,也就是指定动画结束之后,UIView该显示的位置。但是此时并没有计算出view的最终的frame
注释2:先记录动画初始位置;然后在动画中执行layoutIfNeeded,强行执行Layout步骤,计算出每个view的结束位置的frame,也就是动画的终止的frame
注释3:如果在这里执行layoutIfNeeded的话,就会强行计算出每个view的最终的frame,那么动画会将该frame记为初始位置。那么初始位置和结束位置相同,直接跳到最终的位置
可以这么理解:执行完这一个函数后,开始下一帧的绘制;这个时候真实的view已经绘制在最终该显示的位置了,但是被屏幕最上方的Animation的view给遮挡了;这个Animation View从上一帧的状态开始,动画到最终的位置(有待商榷)
1 | // 相对比的UIView animate |
在Auto Layout 视图中获取bound
说说方法:
- 设要获取frame的视图为a,新建一个a的子视图b,使用Auto Layout将b的四边与a对齐
- 重写b的
-drawRect:方法,获取rect的宽高,也就是b的bound - 调用b的
setNeedsDisplay方法,该方法会调用-drawRect:方法,从而获取b的bound
因为在调用-drawRect:的时候,每个视图的frame已经确定了,那么方法中的rect也就是该视图的bound
还有一种更简单的方法:调用View的layoutIfNeeded方法,会立即重新计算每个view的frame
CATransaction 与 CAKeyframeAnimation
在这里详细说一下效果图的实现:
图中的曲线使用UIBezier来画,那么就需要确定的坐标点,也就是需要知道曲线所在的视图的View。那么在
-drawRect:中画UIBezierPath,刚好可以知道view的bound已经得到path之后,使用CAKeyframeAnimation来动画
1
2
3
4
5
6
7
8
9
10
11
12
13
14
15
16
17
18
19
20
21
22// 先设定2个CAKeyframeAnimation
CAKeyframeAnimation *animation1 = [CAKeyframeAnimation animation];
animation1.keyPath = @"position";
animation1.path = animation1Path.CGPath;
animation1.duration = 0.5f;
animation1.removedOnCompletion = NO;
CAKeyframeAnimation *animation2 = [CAKeyframeAnimation animation];
animation2.keyPath = @"position";
animation2.path = animation2Path.CGPath;
animation2.duration = 0.5f;
animation2.removedOnCompletion = NO;
// 更新两个circle的约束
[self.circle1 updateConstraint];
[self.circle2 updateConstraint];
// 执行动画
[CATransaction begin];
[self.circle1.layer addAnimation:consultationKeyAnimation forKey:@"circle1"];
[self.circle2.layer addAnimation:followupKeyAnimation forKey:@"circle2"];
[CATransaction commit];关于CATransaction:在第一次动画没执行完的时候,立刻开始同一个transaction,会强制让第一个transaction的动画立刻结束到终点(也就是去掉Animation View的遮挡),再立刻开始第二个transaction的动画
Auto Layout 百分比布局
这里无主题无关。
iOS AutoLayout 百分比布局 这边文章谈到了Auto Layout百分比布局的问题,讲的很好。说一个里面的例子:子视图b的leading要与父视图a的leading之间隔20%的宽度
1
b.leading = a.trailing * 0.2
使用Masonry
1
2
3
[b mas_makeConstraints:^(MASConstraintMaker *make) {
make.leading.equalTo(a.mas_trailing).multipliedBy(0.2);
}];可以这么理解:
1
2
3
4
a.leading = 0;
a.trailing = a.width;
a.trailing * 0.2 = a.width * 0.2;
b.leading - a.leading = 0.2 * a.width - 0 = 0.2 * a.width
