
2016 Week 1
开年第一周,准备换个方式写博客。就当周记吧,可以肯定这种模式也是持续不了多久的=。=
开篇
2月20号回到武汉;21号回到学校,被基友叫过去看三打白骨精(其实想去看美人鱼来着的…);然后就开始工作了。
开学第一周,没啥具体的任务。自己在github上找了Coding_iOS的源码,照着做了起来。来看看第一周碰到的各类问题。
问题列表
- 状态栏(
UIStatusBar)的显示 - 导航栏(
UINavigationBar)的设置 - 判断iPhone机型
- 第三方库:
JazzHands UIPageControl使用- 圆角Button
- ViewController的两种跳转
- UITableView的
tableHeaderView和tableFooterView UIActionSheet使用- SDWebImage cache相关
进入正文…
状态栏(UIStatusBar)的显示
之前有一篇博客讲到UIStatusBar的设置(iOS导航栏和状态栏设置),这里的是另一种方法–全局设置UIStatusBar。
- 在.plist文件中,将
UIViewControllerBasedStatusBarAppearance设置为NO - 要全局设置UIStatusBar的话
[[UIApplication sharedApplication] setStatusBarStyle:UIStatusBarStyleLightContent]; // 将状态了设置为亮色(白色)
[[UIApplication sharedApplication] setStatusBarStyle:UIStatusBarStyleDefault]; // 将状态栏还原为默认(黑色)
导航栏(UINavigationBar)的设置
同样,在iOS导航栏和状态栏设置这篇里讲过UINavigationBar的设置,这里说的是全局设置UINavigationBar的方法。
方法其实很简单啦,就是通过[UINavigationBar appearance]获得设置UINavigationBar的全局代理,一般在 AppDelegate.m 文件里面设置。代码如下👇
1 | UINavigationBar *navBarAppearance = [UINavigationBar appearance]; |
判断iPhone机型
判断iPhone机型的代码,会经常用到,就放在.pch文件里面吧。代码如下👇
#define kDevice_Is_iPhone6 ([UIScreen instancesRespondToSelector:@selector(currentMode)] ? CGSizeEqualToSize(CGSizeMake(750, 1334), [[UIScreen mainScreen] currentMode].size) : NO)
另外,各种机型对应的CGSize:
- iPhone4(s): CGSizeMake(640, 960)
- iPhone5(s): CGSizeMake(640, 1136)
- iPhone6(s): CGSizeMake(750, 1334)
- iPhone6(s)Plus: CGSizeMake(1242, 2208)
第三方库: JazzHands
JazzHands, 超适合用来做开始界面,来看下面的动态图👇
有关JazzHands的具体使用将在这篇文章(JazzHands)里面介绍=。=
UIPageControl使用
主要就是UIPageControl的几个属性:
- numberOfPages: 总页数
- currentPage: 当前页数
- pageIndicatorTintColor: 小圆点的默认颜色
- currentPageIndicatorTintColor: 高亮当前小圆点的颜色
圆角Button
设置圆角Button与设置圆角相同,关键就是设置:
button.layer.masksToBounds = YES;button.layer.cornerRadius = cornerRadius;
具体代码如下👇1
2
3
4
5
6
7
8
9
10
11
12
13
14
15
16
17self.loginButton = [UIButton buttonWithType:UIButtonTypeCustom];
self.loginButton.backgroundColor = [UIColor whiteColor];
[self.loginButton setTitle:@"登录" forState:UIControlStateNormal];
[self.loginButton setTitleColor:darkColor forState:UIControlStateNormal];
self.loginButton.titleLabel.font = [UIFont boldSystemFontOfSize:20];
[self.loginButton addTarget:self action:@selector(loginButtonClick) forControlEvents:UIControlEventTouchUpInside];
[self.view addSubview:self.loginButton];
[self.loginButton mas_makeConstraints:^(MASConstraintMaker *make) {
// auto-layout code here...
}];
self.loginButton.layer.masksToBounds = YES;
self.loginButton.layer.cornerRadius = buttonHeight / 2;
self.loginButton.layer.borderColor = darkColor.CGColor;
self.loginButton.layer.borderWidth = 1.0f;
ViewController的两种跳转
在ViewController之间跳转,有一下2种方法:
[self presentViewController:loginVC animated:YES completion:nil];
这种方法实现从 self(Source ViewController) 跳转到 loginVC(Dest ViewController)[self.navigationController pushViewController:destVC animated:YES];
这种方法实现从 self(Source ViewController) 跳转到 destVC(Dest ViewController), 但是这里的self(ViewController)必须在一个UINavigationController里面
UITableView的tableHeaderView和tableFooterView
- tableHeaderView - table - tableFooterView 依次排列
- 这两个view属于scrollview, 他们会随着table一起移动
UIActionSheet使用
先看看实现效果👇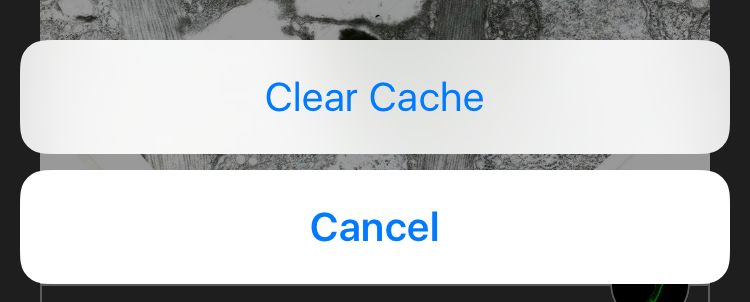
具体实现:
- 初始化
1
2
3
4
5
_actionSheet = [[UIActionSheet alloc] initWithTitle:nil
delegate:self
cancelButtonTitle:@"Cancel"
destructiveButtonTitle:nil
otherButtonTitles:@"Clear Cache", nil]; - 实现
UIActionSheetDelegate的点击时间委托1
2
3
4
5
6
7
8
9
10
11
12- (void)actionSheet:(UIActionSheet *)actionSheet clickedButtonAtIndex:(NSInteger)buttonIndex {
switch (buttonIndex) {
case 0:
// do something here
break;
case 1:
// do something here
break;
default:
break;
}
}
SDWebImage cache相关
- 清除缓存
1
2
3
4
SDWebImageManager *imageManager = [SDWebImageManager sharedManager];
[imageManager.imageCache clearDiskOnCompletion:^{
NSLog(@"vanney code log... cache cleared");
}]; - 显示缓存信息
1
2
3
SDWebImageManager *imageManager = [SDWebImageManager sharedManager];
[imageManager.imageCache getSize]; // 缓存的大小 除2次1024 得到MB
[imageManager.imageCache getDiskCount]; // 缓存图片的数量
参考
All articles in this blog are licensed under CC BY-NC-SA 4.0 unless stating additionally.